Quick Start Guide
Welcome to Nerds Mail Protection
Before we begin, there are a few words that we use a lot when talking about email and spam that we should define:
SPAM – Spam is any email that was sent to you without your permission, or that you did not solicit, and that you do not want to receive. This is a rather vague definition, because the concept of spam is rather vague. A particular message may be spam for one person and not for another. If you have more than one email address, you might consider a message spam in one inbox, but not another. That is why Nerds Mail Protection gives you so many ways to control which email messages make it into your inbox and which ones do not.
Whitelist – A whitelist is a list “message rules”. A message that matches any rule on this list will ALWAYS be sent to your inbox and no attempt will be made to determine whether it is spam. We will show you how to set up personal whitelists later.
Blacklist – A blacklist is also a list of “message rules”. A message that matches any rule on this list will ALWAYS be blocked from delivery to your inbox. We will show you how set up personal blacklists later.
Quarantine – Your quarantine is a sort of “holding pen” for messages that have been flagged as spam. You can examine the quarantine at any time to see if there are messages there that you want to release for delivery.
Digest Message – This is a special message that Nerds Mail Protection can send you as often as three times per day, or as seldom as once per week (or not at all, if you prefer). It contains links to the messages that are you have received since the last digest message was delivered and which have been flagged as spam. If you want the message to be delivered to your inbox, you can simply click the link. We will show you how to set your digest message preferences later.
For most of you, Nerds Mail Protection will work with little or no configuration at all. Simply click on the digest messages that you receive and you will see a list of emails that have been blocked. You can click on any message that you want to release for delivery and it will be delivered to your inbox. If you release a message for delivery, you will also be presented with the option to whitelist that sender. That means that any future messages from that sender will not be treated as spam and will be delivered to your inbox. Over the course of the first couple weeks, you will “train” Nerds Mail Protection by adding the addresses from which you want to receive mail to your personal whitelist. This may be all you need or want to do to “train” Nerds Mail Protection. HOWEVER……..
If you want to see how much spam and virus-infected mail is being removed for you, or if you want to access some of the more advanced features of Nerds Mail Protection, you can log into your personal control panel at:
https://login.nerdsmailprotection.com
Log in with your username and password. Your username is your email address and your password is the same password you use to access your e-mail, or the password that has been assigned to you. We will show you how to change your password later.
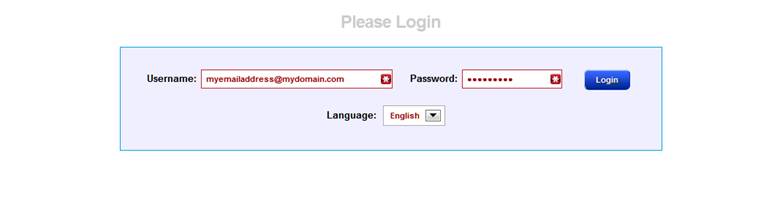
You can choose your language here as well.
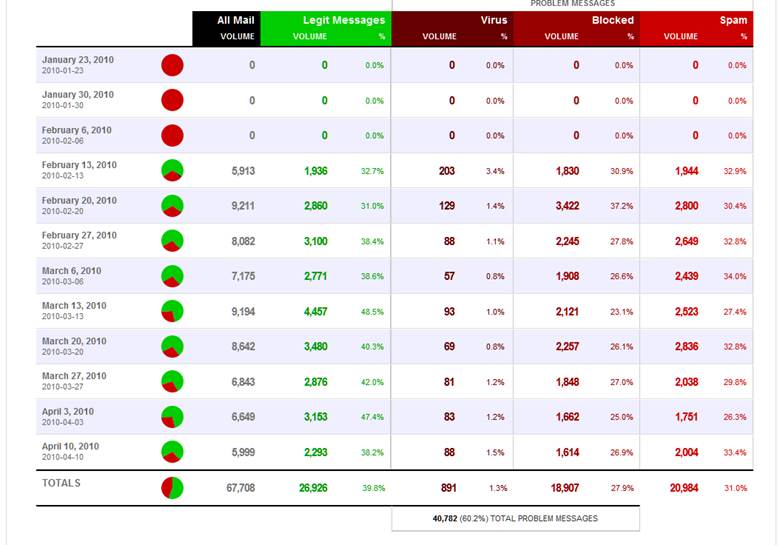
Your dashboard will look something like this:
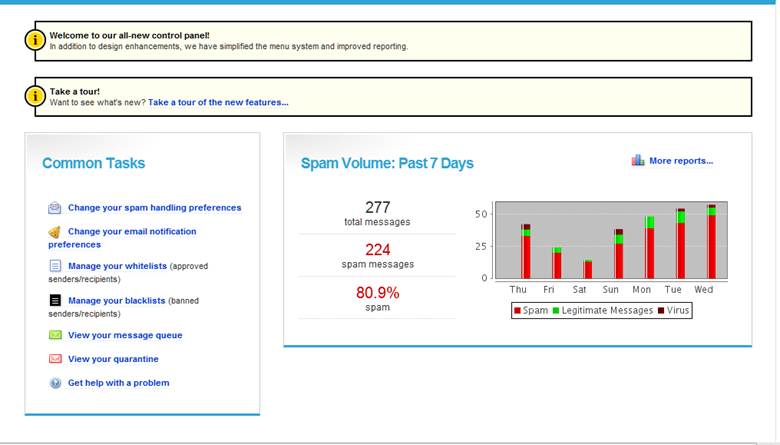
You can always return to this screen by selecting the “Home” tab from the top row of tabs.
The portion on the right shows how much of the mail sent to you was identified as spam or contained a virus.
On the left you will see links to common tasks.
Messages:
You can select the “Messages” tab from the second row of tabs to see the messages in your quarantine.
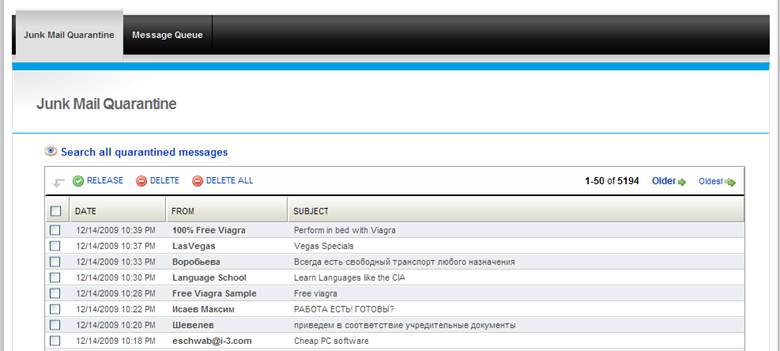
You can choose messages that you would like to delete or release for delivery from here. You do not need to delete spam from the quarantine. It is automatically deleted after ten days.
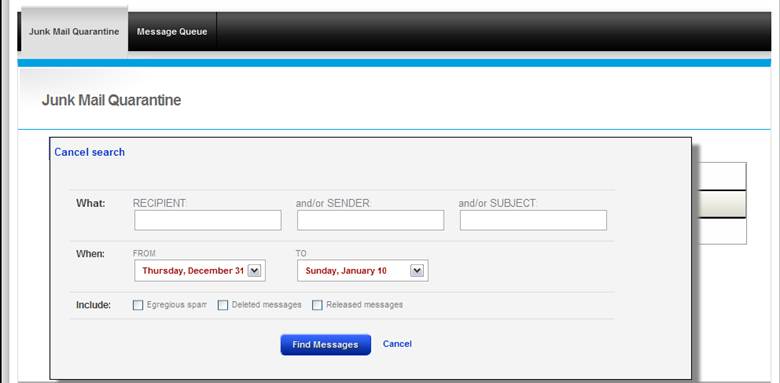
You can also search the quarantine for messages, based on the Recipient, the Sender, or the Subject.
One of the great features of Nerds Mail Protection is that you can still access and respond to incoming messages, and even compose new messages, even when your (or your email provider’s) email servers are temporarily offline or unavailable. This could be the result of a planned outage for maintenance, or your provider could be experiencing hardware or connectivity problems.
Selecting the “Message Queue” tab from the second row will show any messages in queue. This section will be empty unless there is a problem with your email provider’s mail servers.

Preferences:
Selecting the “Preferences: tab on the top menu will allow you to set your personal preferences for Nerds Mail Protection.


The second row of tabs shows the personal preferences you can configure. The Spam Handling tab will allow you to control how spam is filtered from your mail. There are links on the left of the screen. Clicking the Aggressiveness link will allow you to determine how aggressively spam is filtered. A more aggressive setting will result in less spam, but may also result in more “false positives”, or messages that are treated as spam, but are ones you want to receive. A less aggressive setting will result in fewer false positives, but may allow a few more spam messages to pass through to you inbox. You can move the slider to the position that works best for you.

You will have to click the “Save Changes” button to save your changes on all screens.
The “Handling Options” link lets you decide what happens to messages that are flagged as spam. They can be dropped silently, redirected to your junk mail quarantine, delivered to your inbox (see below to have **SPAM** added to the beginning of the subject line so you can identify them easily), or delivered to a different mailbox. Most people want to have spam messages redirected to their quarantine, just in case they want to release them later.
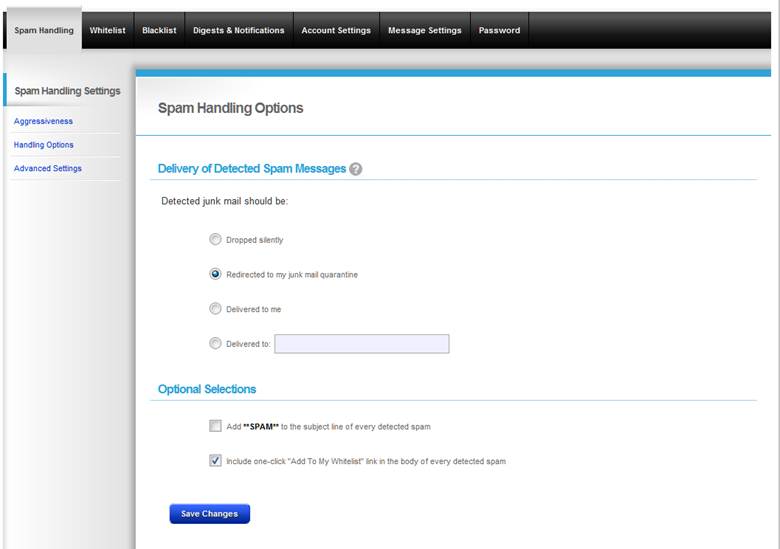
In the lower panel, you can opt to have **SPAM** added to the subject line of every message that is flagged as spam. That makes the spam messages easier to identify. There is also a checkbox here to include a one-click link that will allow you to add any message flagged as spam to your whitelist.

The “Advanced Settings” link provides a few more options. You can choose to hide messages that are “Egregious Spam” (those that are almost certainly spam) and messages from senders that you have chosen to blacklist. If you choose this option, these messages will not be listed in your digest messages or in your quarantine. You can also choose to hide messages that have been determined to contain viruses.
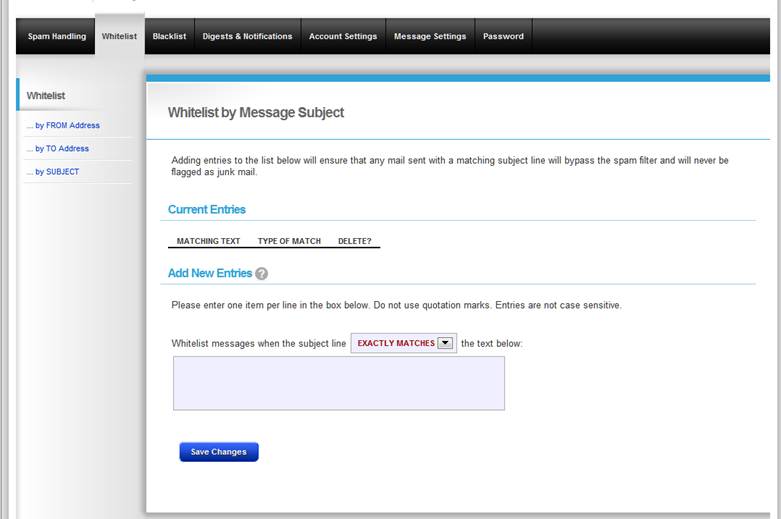
The “Whitelist” tab takes you to a screen where you can set whitelists. You can set whitelists based upon:
FROM Address: Any message that comes from this address will be whitelisted
TO Address: Your email administrator can help you set up “alias” or “forwarding” email addresses that then send mail to your main email address. You can then give those addresses only to certain senders. Whitelisting them will ensure that they are always delivered.
SUBJECT: You can set rules to whitelist messages with subject lines that exactly match, begin with, end with, or contain a string of characters.
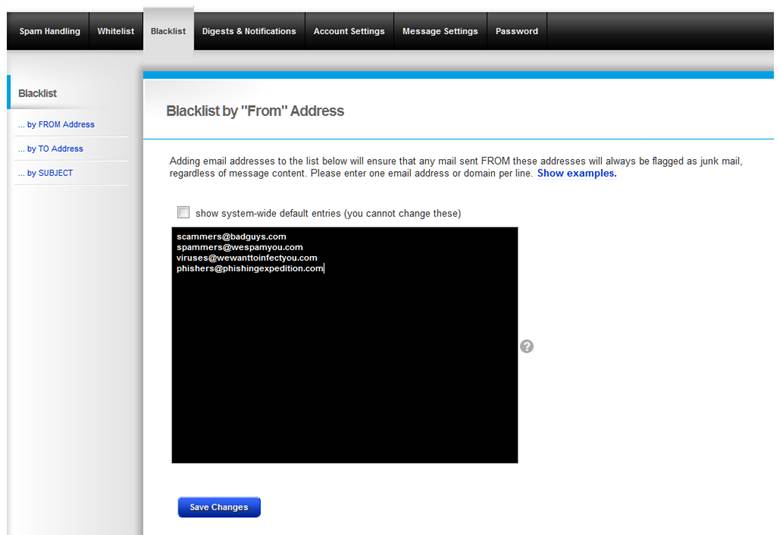
The “Blacklist” tab works the same way, except that messages that match the rules will be blacklisted.
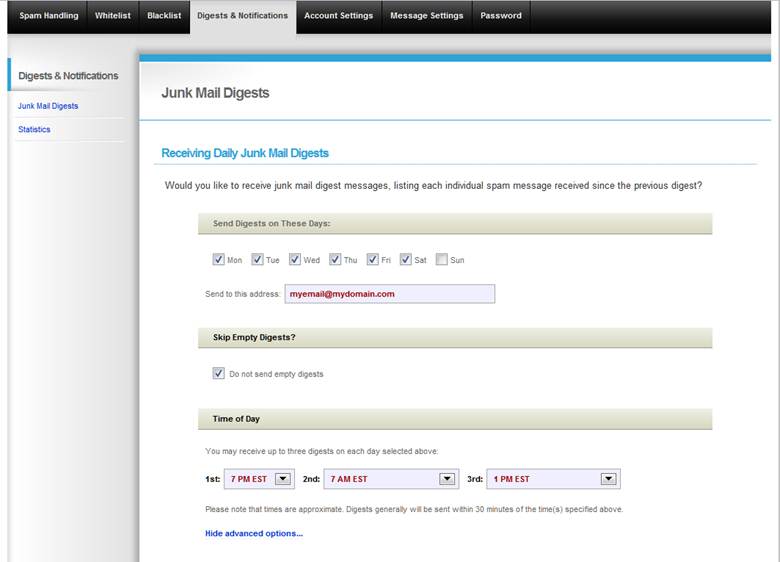
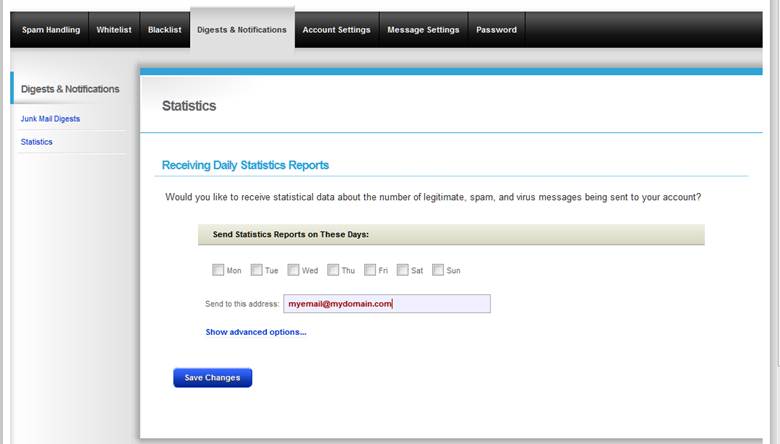
The “Digests and Notifications” tab allows you to control whether and how often you receive digest messages. You can choose the days of the week when messages are sent. If you want the messages to go to a different email address, you can enter one. If you click the “Show advanced options” link, you can set the time of day when the digest messages are sent. You can also choose whether you want to receive 1, 2, or three digest messages per day. Most people will want to check the box that prevents empty digests from being sent. You can also choose to re-send digest messages from the past few days.
If you want to have daily statistics reports sent to you, click the “Statistics” link.
Selecting the “Account Settings” tab allows you to select a time zone and a language.

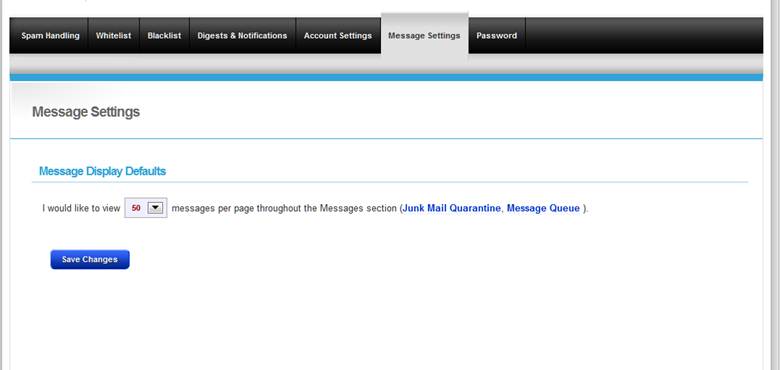
Selecting the “Message Settings” tab allows you to choose the number of messages you can view per page in the Junk Mail Quarantine and the Message Queue.
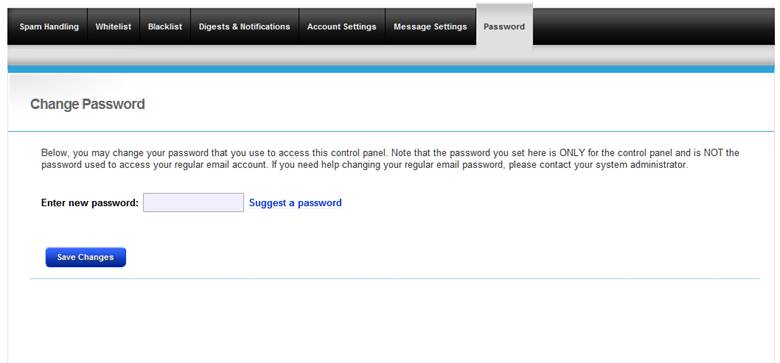
Selecting the “Password” tab will allow you to set a password for the dashboard. This does NOT change the password you use for logging in to your mailbox.
Reports:
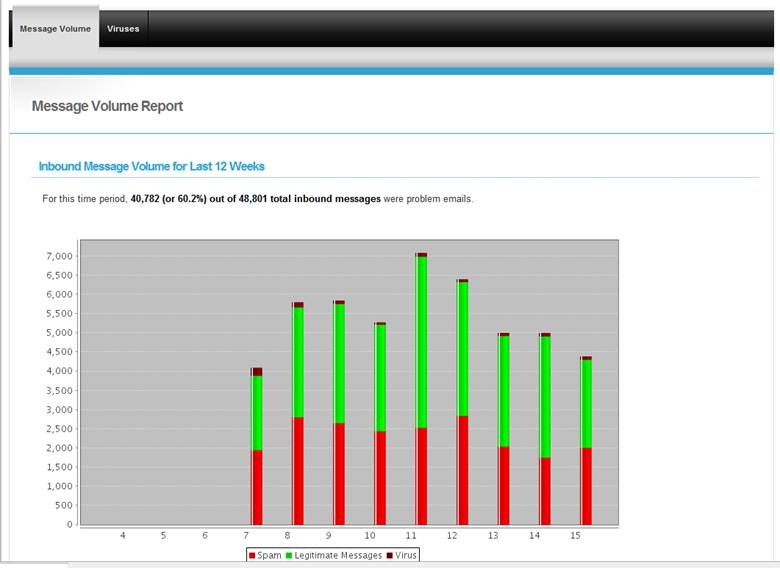
Select the “Reports” tab on the top row of tabs to view statistics and see a graph of the service Nerds Mail Protection is providing. You can generate reports covering the last 24 hours, the last 7 days, the last 12 weeks, or the last 12 months.
The report shows information in the form of a bar graph, in the form of pie charts, and with statistics.
Support:
If you have any questions, or if you want to know more about how Nerds Mail Protection works, you can select the “Support” tab from the top row of tabs.
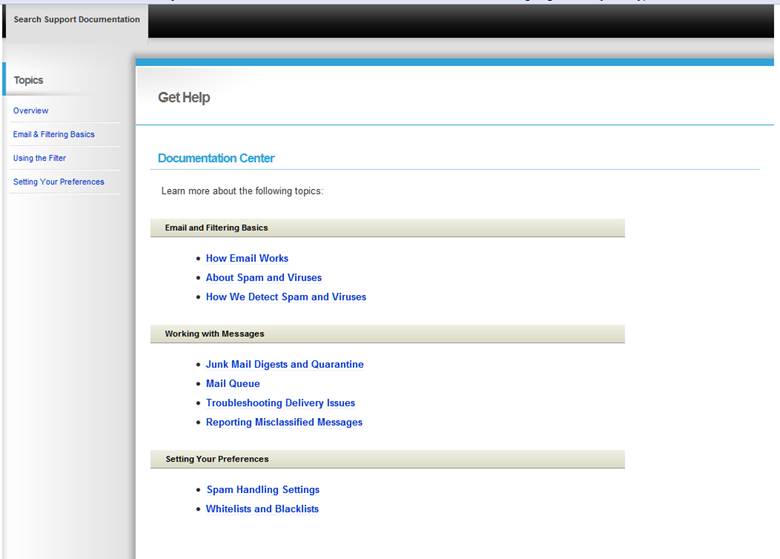
Here you will find links to lots more information. Of course, Nerds On Site is always there to help as well.